Rail connectors
15 products


15 products
THE Rail lighting are the trend of the moment to intelligently illuminate your shop. Indeed, different options are offered according to your needs. Do you want to connect two or three rails together? It is possible thanks to our cheap rail connectors! You will find various forms: in X, L, in t or linear simply. These accessories are essential if you want to have a well -defined shape. They are available in white or black and they are used in all discretion. Finalize your installation by opting for our single -phase rail connectors and our Triphase rail connectors.
In addition to being ultra-trendy and bringing a touch of modernity to the room, the rail lights are very practical. This category of lighting excels in the art of illuminating a large space and allows a fair distribution of lighting, enough to enhance the slightest corner of the room. Rail lights therefore constitute an optimal lighting solution for large spaces, such as a department store or a gallery. In addition, the ramps of spots can be installed as you see fit to cover all the space, as long as you use rail connectors adapted. Silumen offers you a wide selection of rail connectors to optimize the smart layout of your lights on rail.
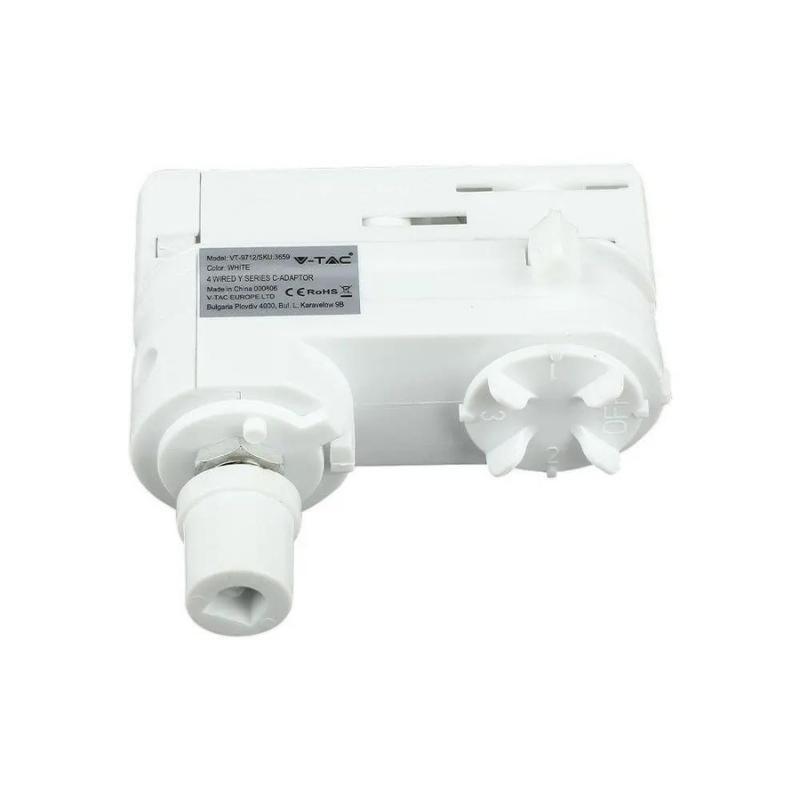
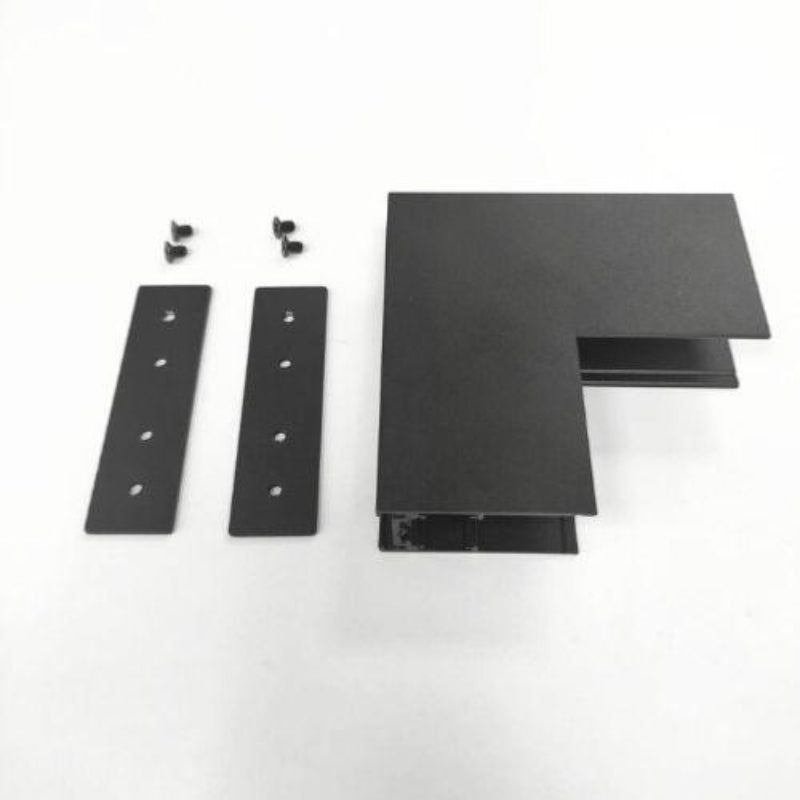
Raw connectors are mounting accessories that go hand in hand with the installation Rail lighting in a large space. The latter are available in an infinity of models that distinguish themselves from each other by their shape, their color and the type of electric current they lead. In practice, rail connectors cannot be chosen anyway. The connectors models to be integrated into an installation depend on the development of the planned spot ramps and are strategically chosen according to.
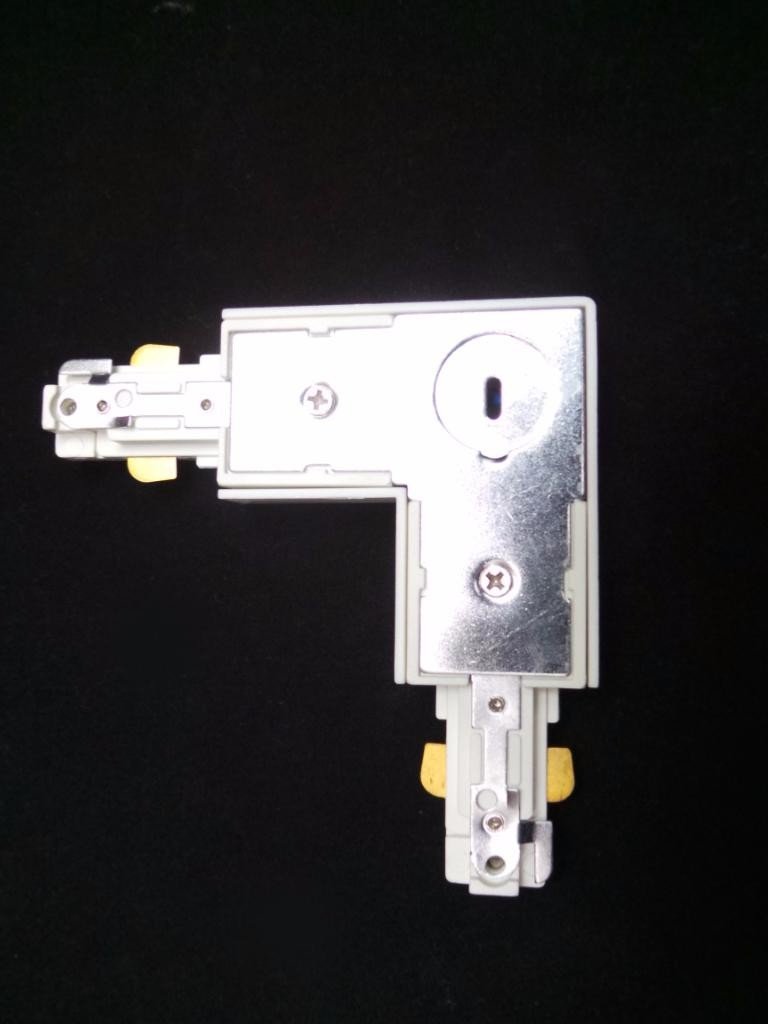
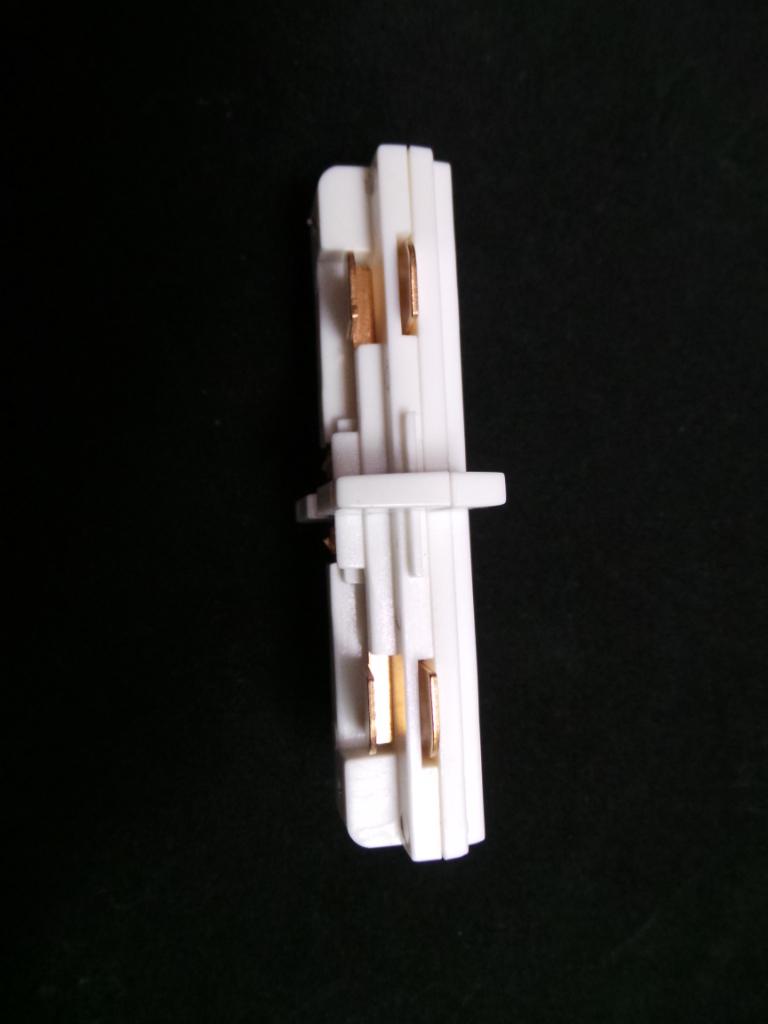
Concretely, a rail connector takes place at the mouth of two, three or four ramps for spots and serves, as the name suggests, to connect them to close the circuit. This assembly accessory plays a crucial role in this type of installation, hence the interest of Choose only the best rails connectors In order to intelligently arrange the lights on rails in your space.
In the world of professional lighting, there are as many types of rail lighting installations as models of rail connectors. In absolute terms, these mounting accessories are the key element that allows you to vary the model for the development of ramps for spots on the ceiling. Thanks to the right rail connectors, you can tailor the installation of your lights on rail to your needs and the vastness of the space to light. But you still have to choose the right connectors!
At Silumen, Raw connectors are available for cheap In a wide choice of different models and versions. At first glance, the shape of the connectors is what differentiates these mounting accessories between them. However, beyond the appearance of rail connectors, one of the determining criteria in your choice, the latter are grouped into two distinct categories:
The type of rail connectors chosen must absolutely correspond to the type of installation circuit in order to operate everything.
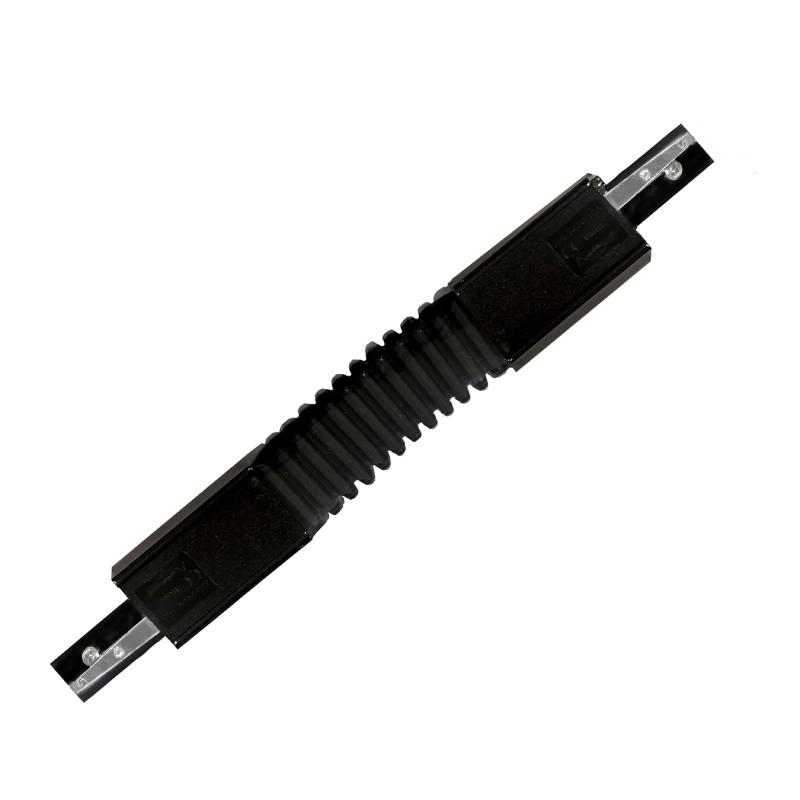
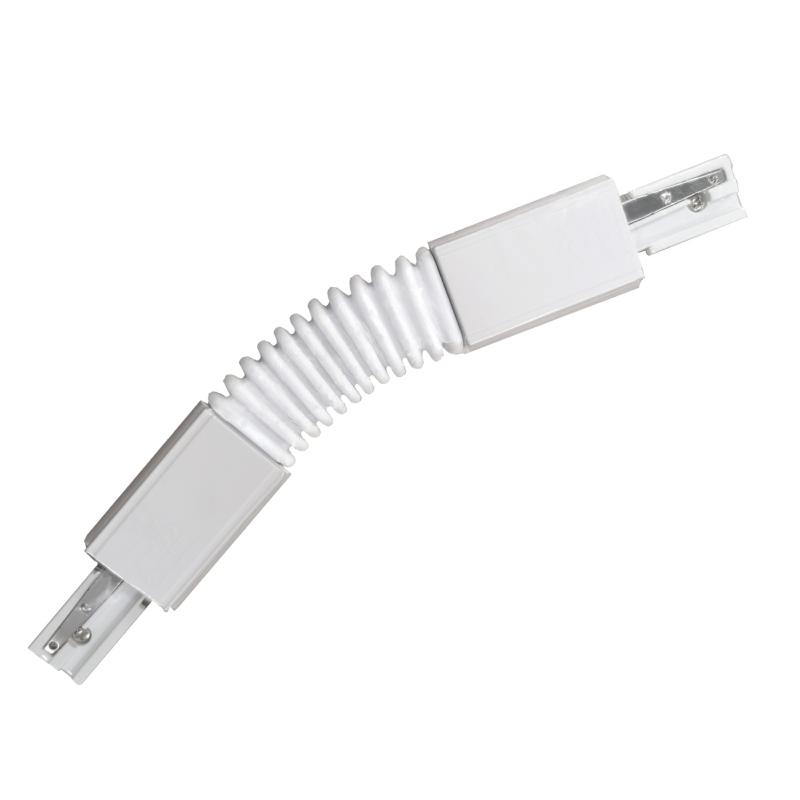
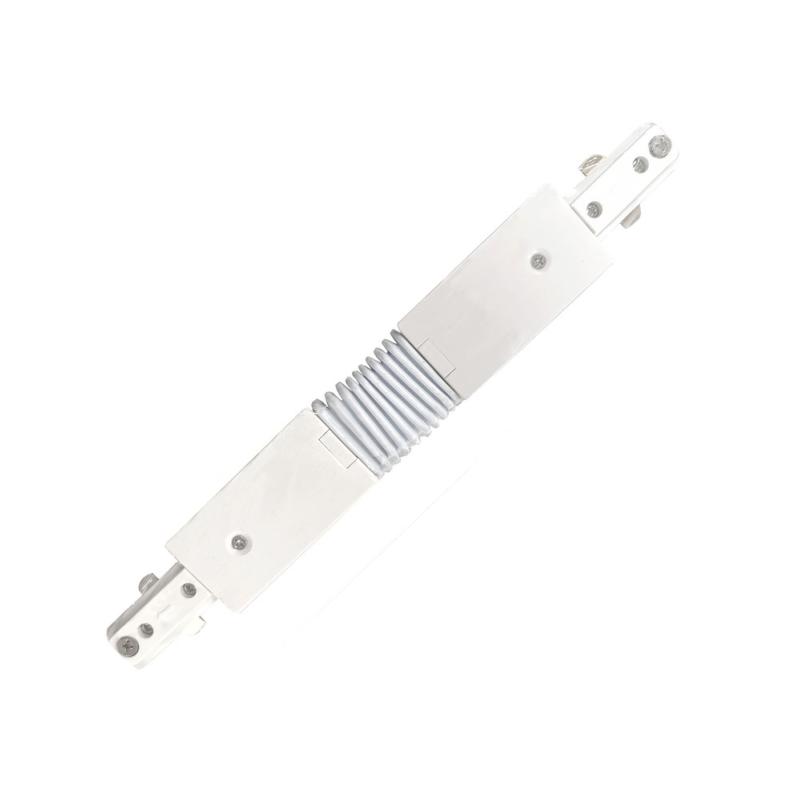
In addition to their technical aspects, the rail connectors are also offered in different colors to better blend into your installation. Order connectors for rails White in color to connect your ramps of white spots together, choose the blacks to better correspond to black rails.
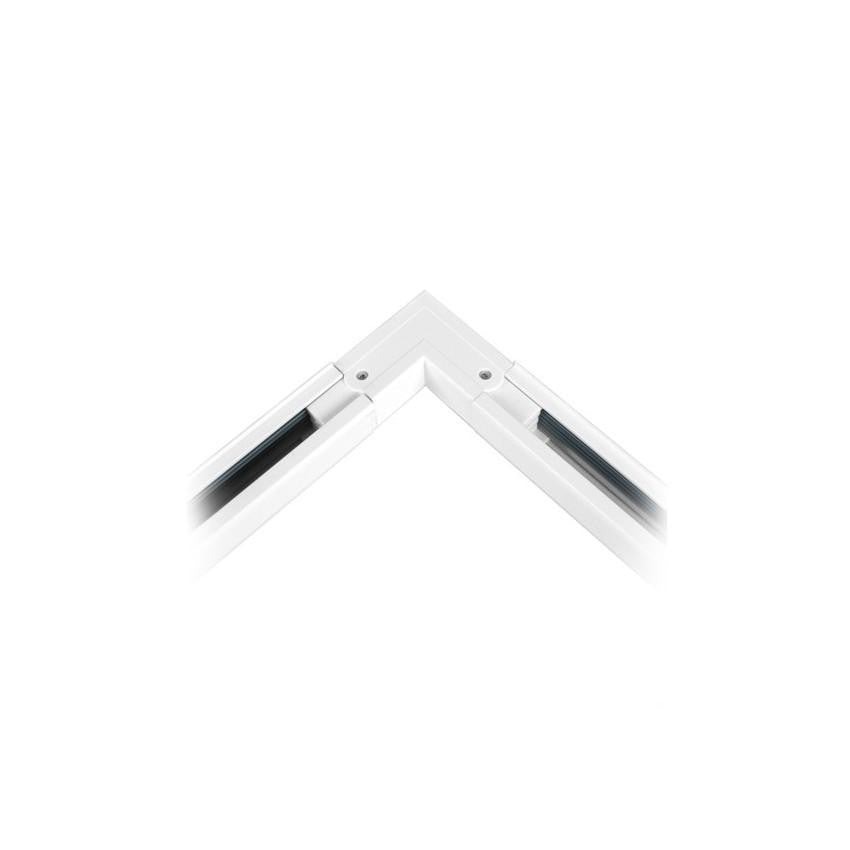
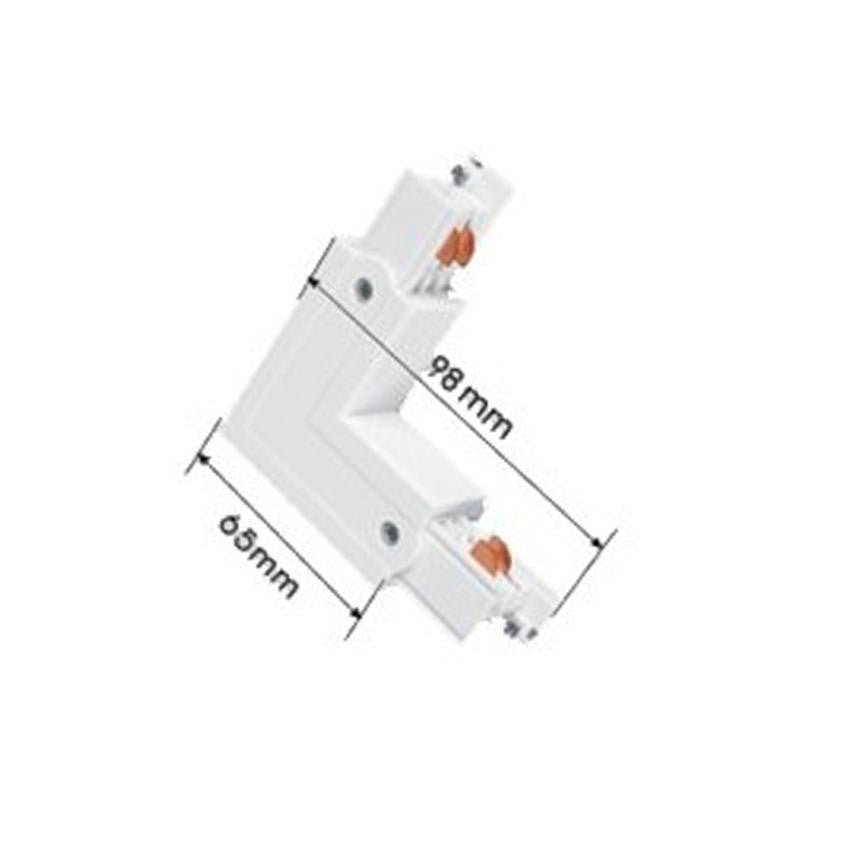
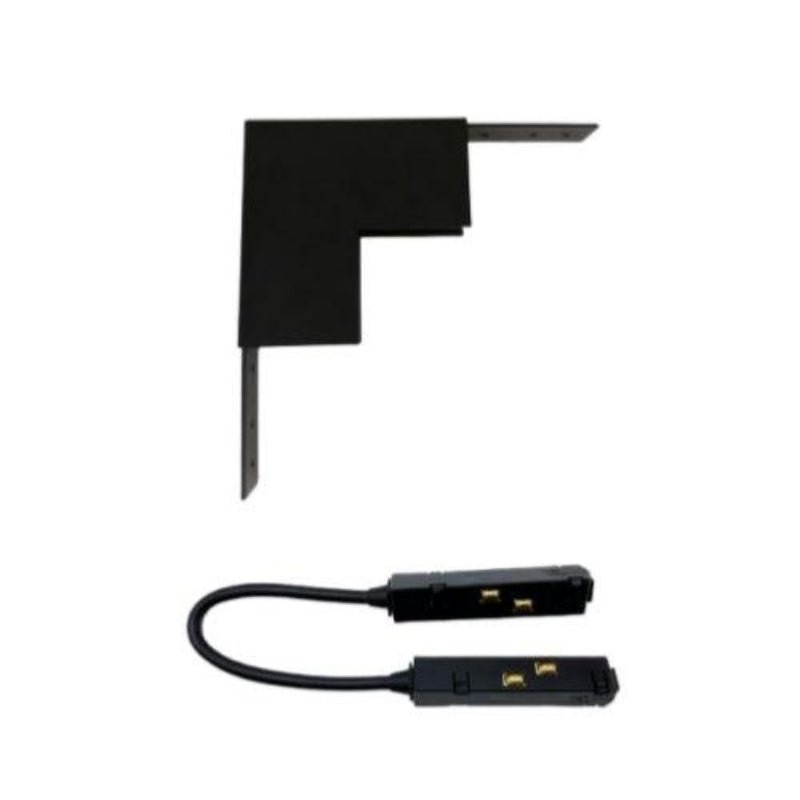
Before thinking about the color and installation system of rail connectors (single -phase or three -phase), first think of the form of the accessory. Indeed, the shape of the connector is what will allow you to shape the layout of your lights on rail as you see fit. It's simple: if two ramps of three -phase white spots meet in a corner of the ceiling by forming a 90 ° angle, you will need a Angular connector for white three -phase rails to connect them.
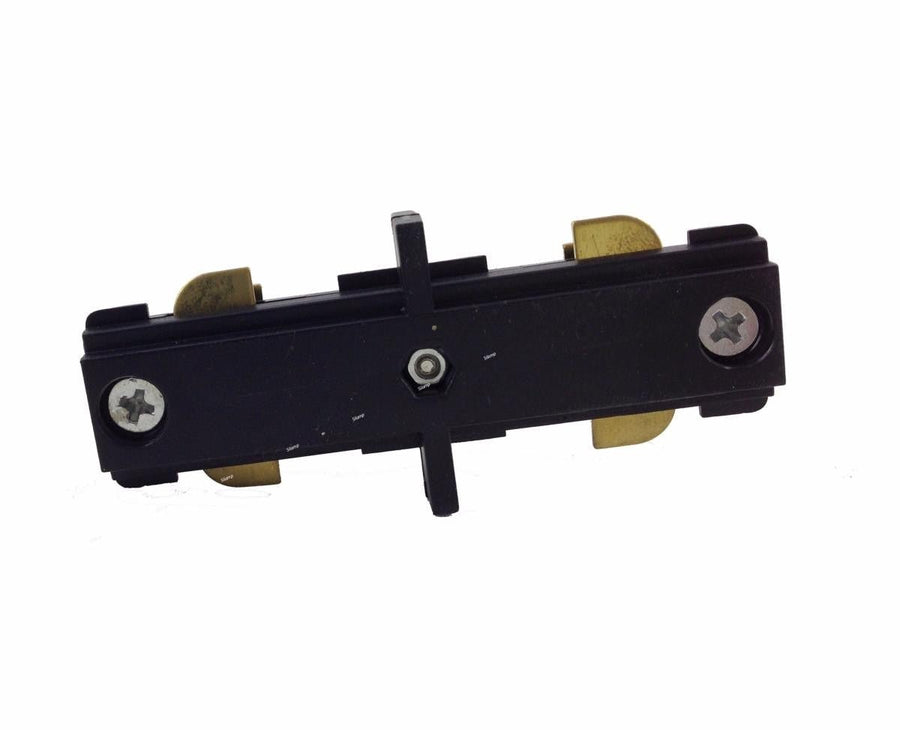
Not all rail connectors have a particular shape. THE single -phase linear rail connector This is a perfect example. This model is particularly useful in the development of a large space. Indeed, if the length of a ramp of spots is not enough to cover the entire length of the part, you can put several rails end using connectors for linear rails.
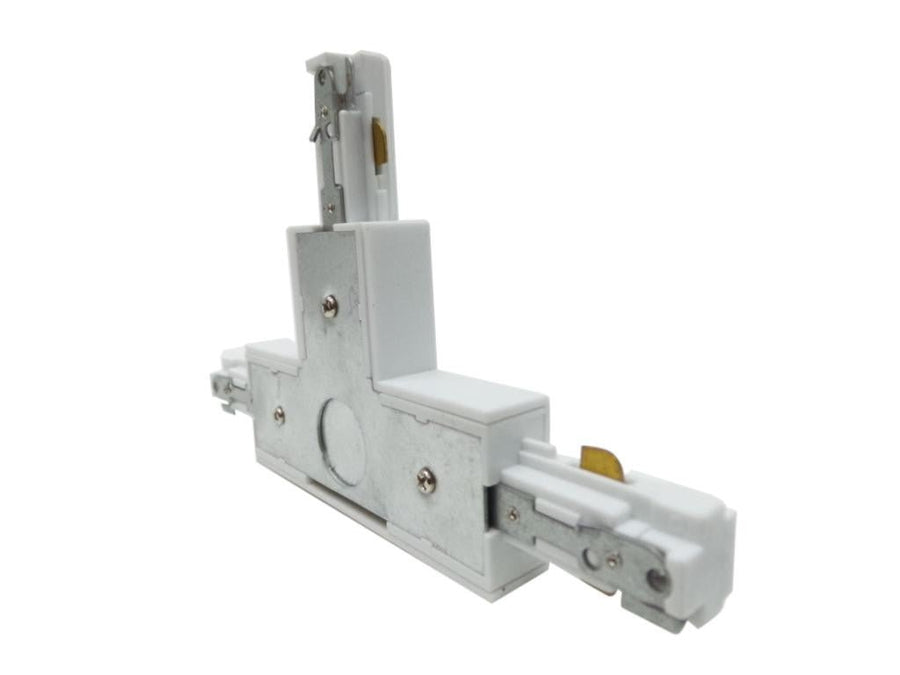
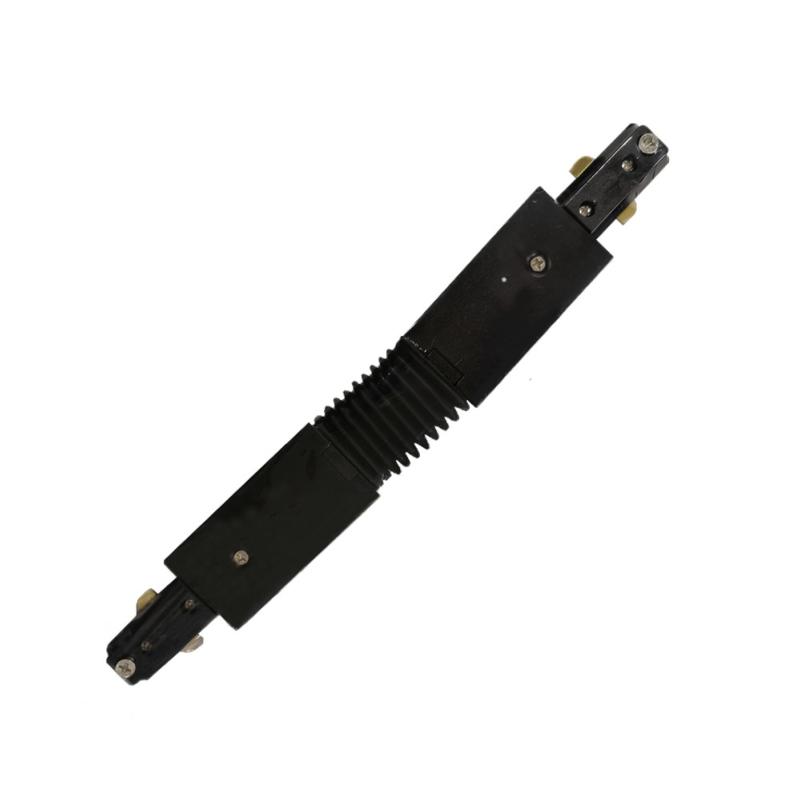
The flexible rail connector is, as its name suggests, a flexible model that adapts to your needs. Chosen single -phase or three -phase, this type of rail connector has the advantage of being able to be used as a linear or angular connector to connect your spots for each other. The same logic applies to the choice of the flexible model which corresponds to your type of installation: a Flexible connector for black three -phase rails For black ramps, a single -phase white model for single -phase white ramps.
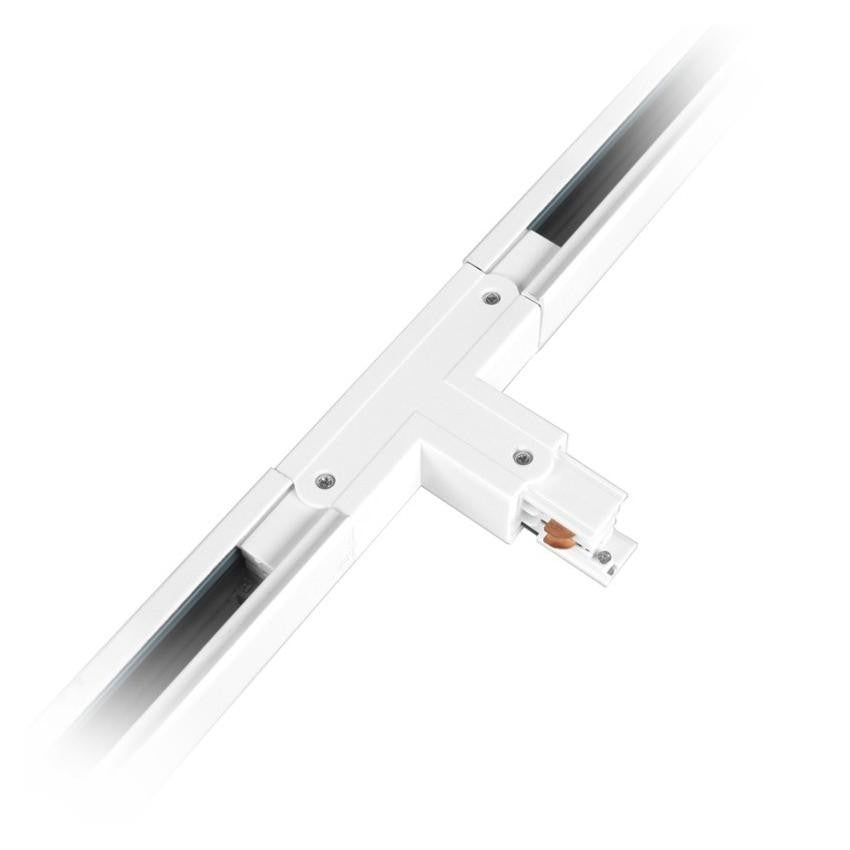
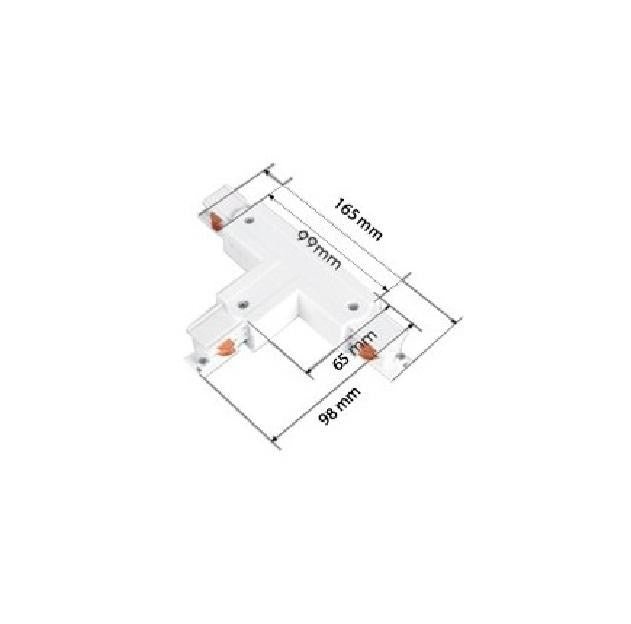
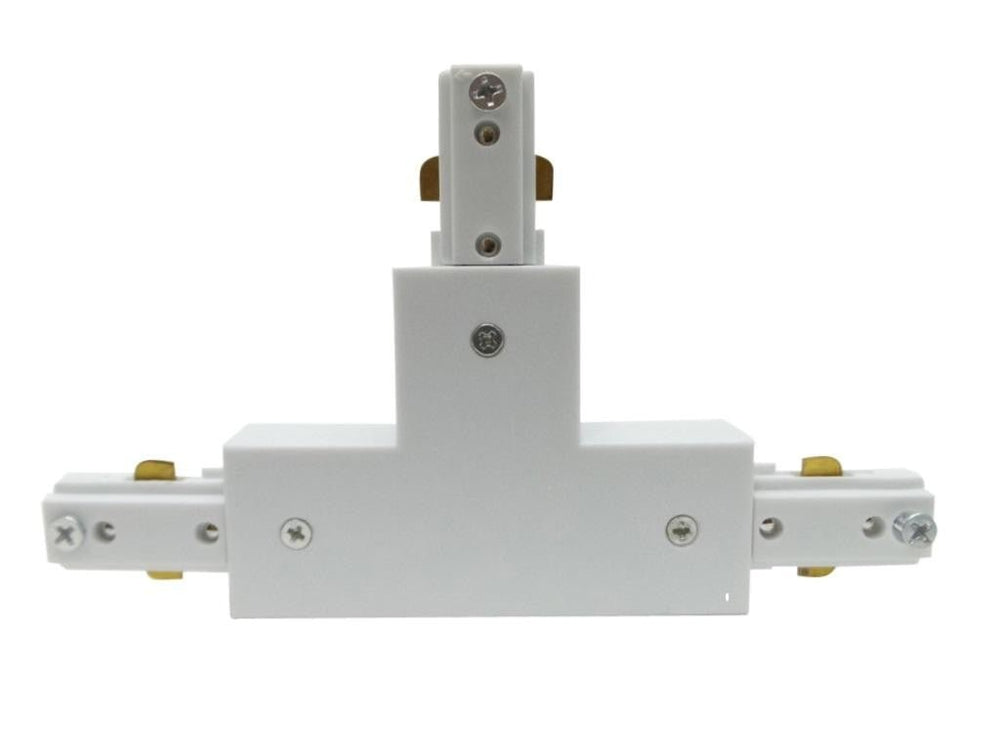
THE T -shaped rails connector is used to connect three rails for spots to end the ends to create perpendicular ramification. It usually takes place at the mouth of three ramps of spots that meet at the level of the ceiling. Again, you must Buy the right rails connectors depending on the type of rail And choose the color (white or black) that suits you.
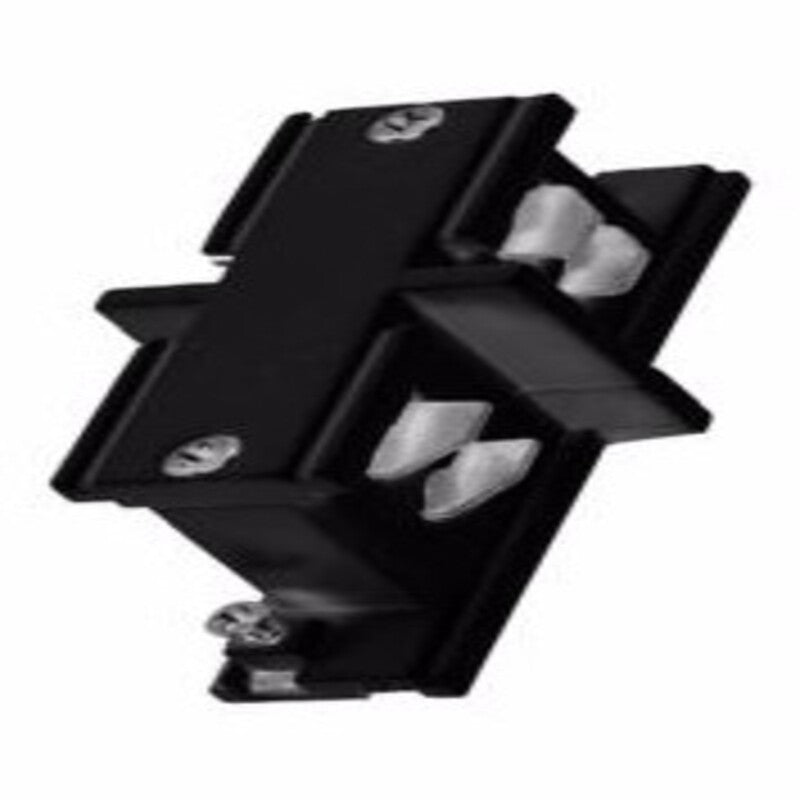
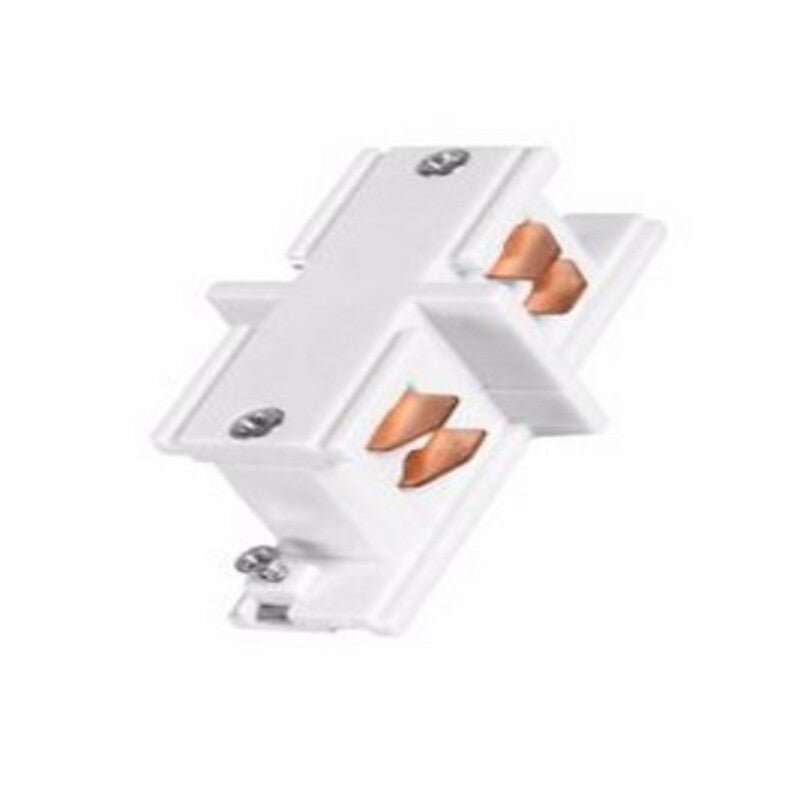
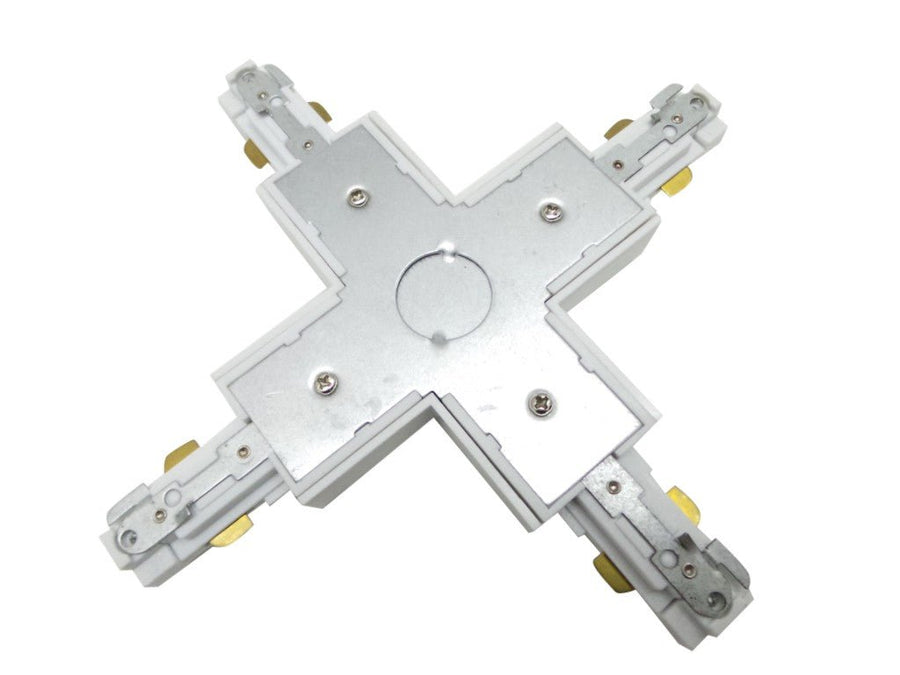
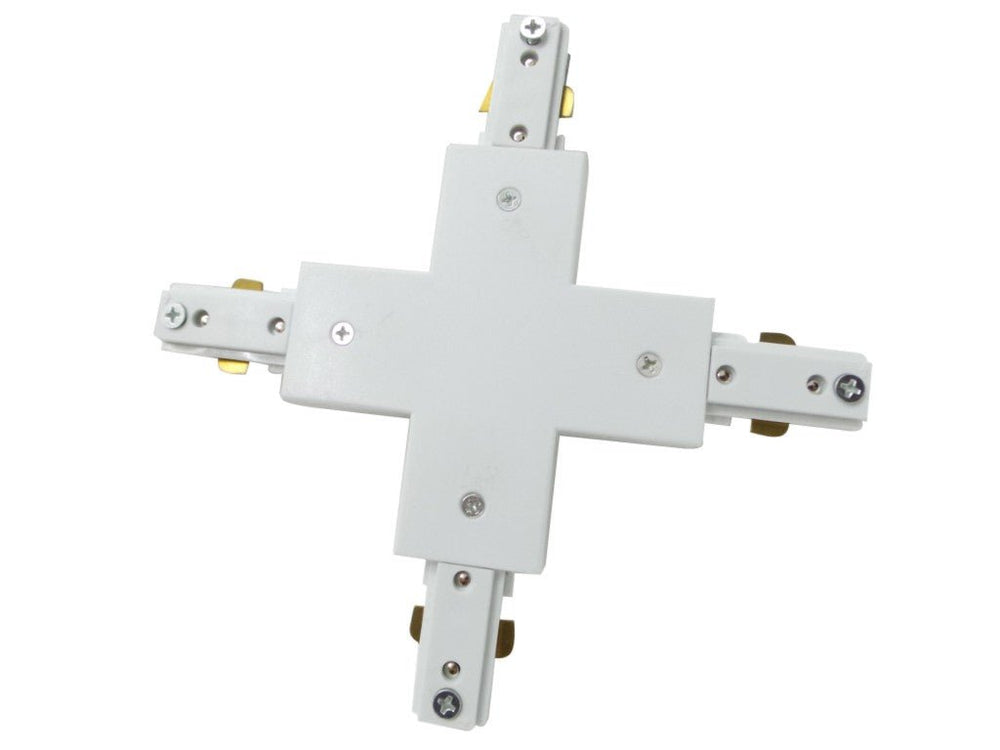
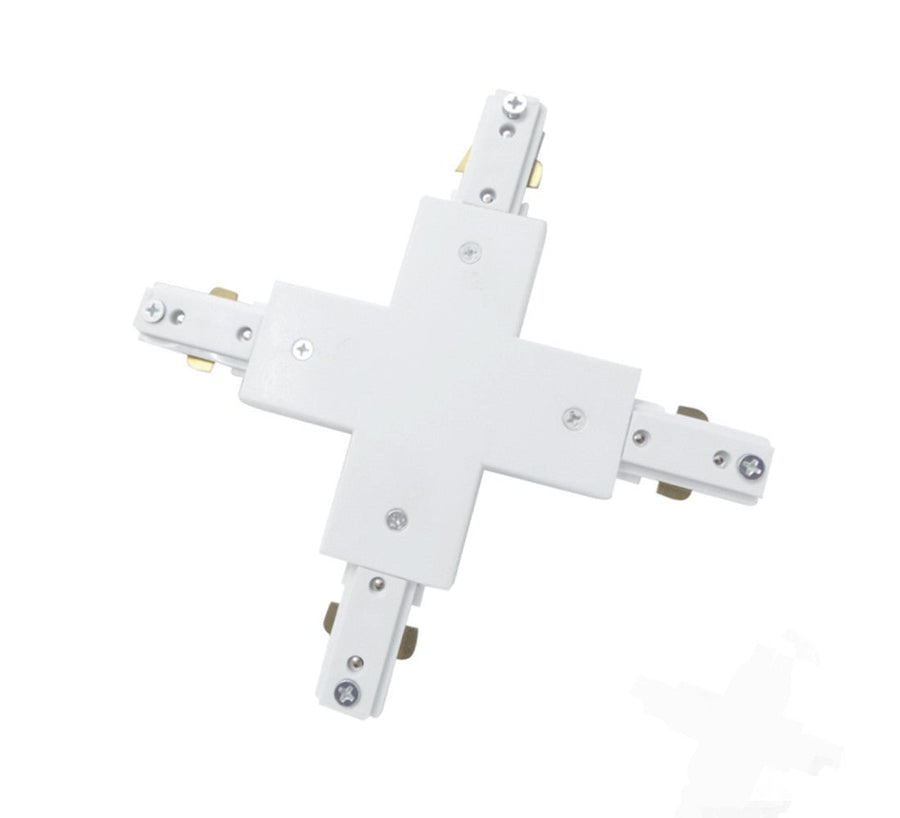
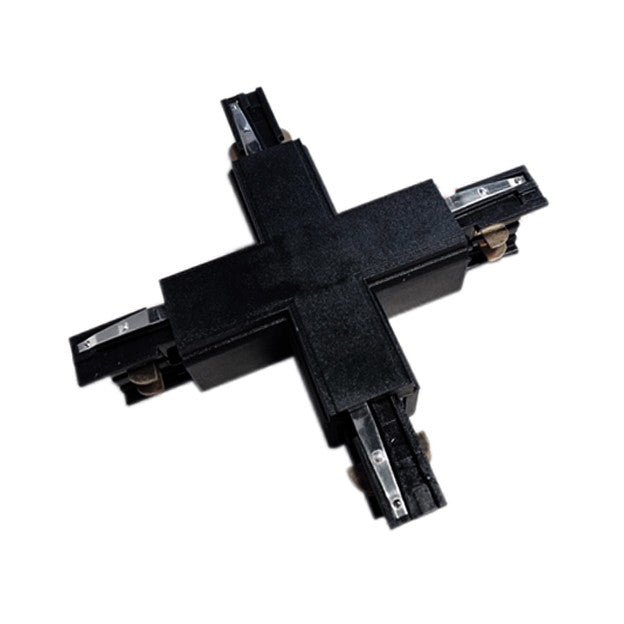
Perfect for creating a four -rated spot branch in the center of the ceiling, the X -shaped rails connector is essential to infinite your network of lights on rails. In doing so, you make sure to cover all the space.
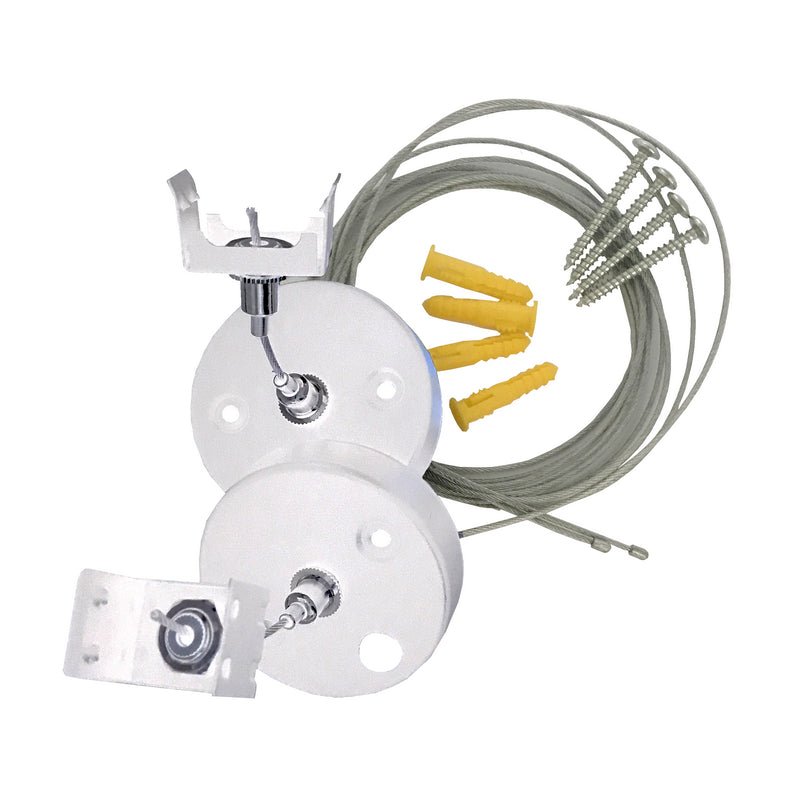
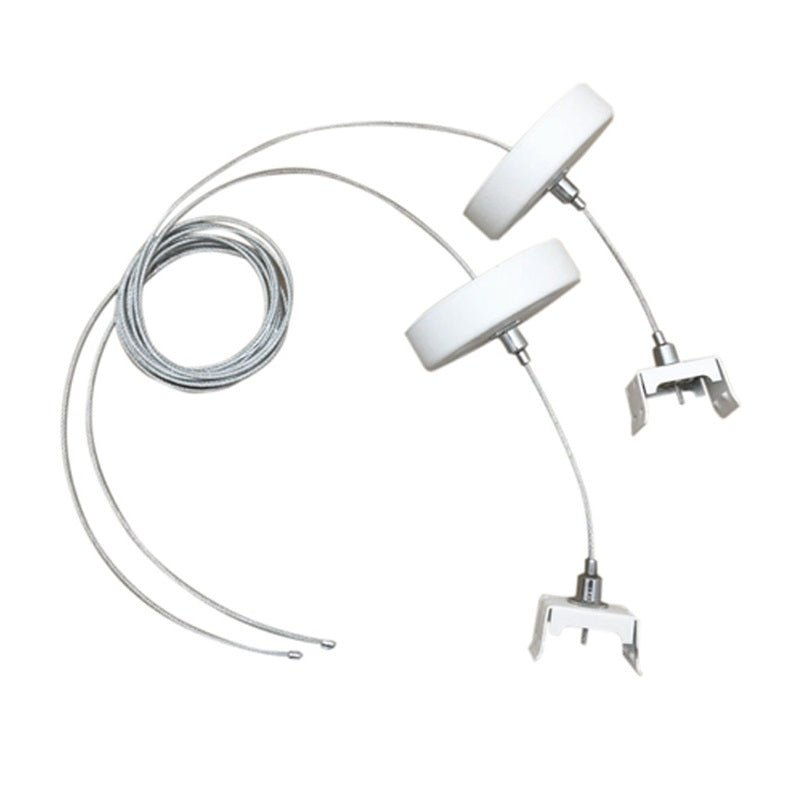
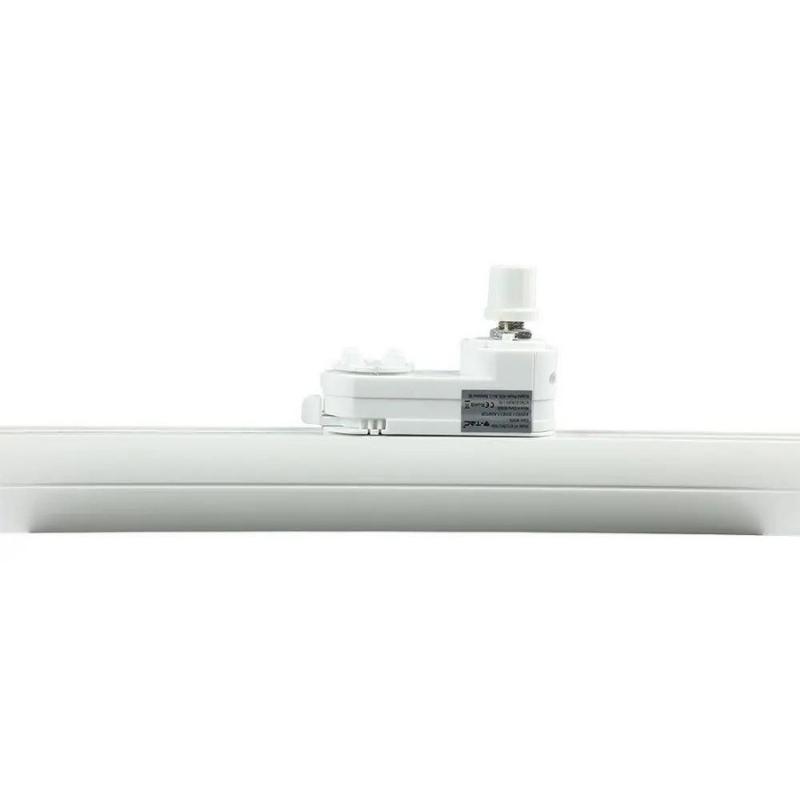
Install your rail connectors At the mouth of two, three or four rails for spots you want to connect to each other. Their installation must be done at the very moment of setting up lighting on rail. To do this, you need:

Paiement sécurisé
CB, Paypal, Virement, Mandat

Satisfait ou remboursé
14J pour changer d'avis

Livraison offerte
Dès 59,90€ d'achat

Service client disponible
01-82-88-32-75

Discover our story at Silumen, a family business created in 2017. We sell LED products, connected objects and interior decoration.

Let yourself be guided in the installation of our products with our advice and installation guides developed by our experts.

Discover our best lighting solutions to equip your professional space in a modern and functional way.