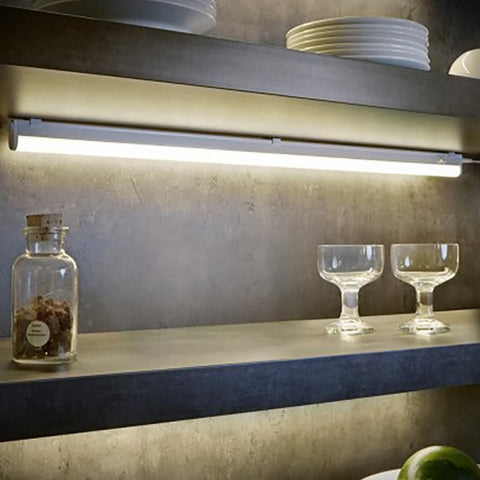





Types of LED tube: single-ended vs double-ended supply
Before modifying your installation, identify the type of LED tube you are going to fit, as this determines how it must be wired. There are two types:
- Double-ended LED tube: the live is connected at one end of the tube and the neutral at the other, exactly as with a standard fluorescent tube. This type, known as bipolar or double-ended, is powered from both ends.
- Single-ended LED tube: the live and neutral must be connected to the two pins at the same end of the tube, the other end being unpowered. This type, known as single-pole or single-ended, is often considered safer because only one end of the tube is live, but pay attention to which way round you fit it.
Make sure you know which type of LED tube you have (marked on the tube or in its instructions) so you can rewire the fitting correctly. A single-ended tube often has a marking showing which end to connect to the mains. If you get it wrong (tube the wrong way round), the LED tube will not light: simply turn it around.

Comparison table:
| LED tube type | Electrical connection | Fitting direction | Safety | Notes |
|---|---|---|---|---|
| Double-ended supply | Live at one end, neutral at the other | Either way round | Less safe (both ends live) | Similar to wiring a standard fluorescent tube |
| Single-ended supply | Live + neutral at the same end | Must be fitted the right way round | Safer (only one end live) | Check the live end marked on the tube or in the instructions |
Case 1: Installing an LED tube in a new fitting

If you use a new holder designed for LED tubes, such as our battens for T8 LED tubes, installation is simpler. No rewiring is needed because these battens have no ballast: the LED tube connects directly to 230 V. Here is how to proceed:
- Mounting the batten: fix the new LED batten where you want it and connect it to the mains (live and neutral) in line with the manufacturer's instructions and current standards.
- Tube compatibility: before inserting the tube, make sure the batten is compatible with your LED tube. In particular, check the type of supply the batten supports (some holders are wired for single-ended tubes, others for double-ended ones). Use a batten suited to the format: T8 LED tube (G13 cap) or T5 LED tube (G5 cap).
- Inserting the LED tube: position the LED tube by lining up its pins with the lampholders, then turn it about a quarter turn until it locks. Be sure to respect the polarity or supply direction marked on the tube.
Switching on: restore the power and switch on. The LED tube should light up instantly. Check that the connections are secure and that there is no abnormal flickering.
Case 2: Replacing a fluorescent tube with an LED tube in an existing fitting
This diagram shows how the wires previously connected to the ballast are rerouted to the LED tube's lampholders. Below, we explain step by step how to carry out this modification safely.
In most cases, you can reuse your old fluorescent fitting to install the LED tube, provided you modify its internal wiring. You need to remove the ballast (and the starter, if there is one) so that the LED tube is powered directly from the mains.
Follow these steps:
- Switch off the power supply. Before doing anything, switch off the power at the main circuit breaker to avoid any risk of electric shock. Use a tester to check that the fitting's circuit is no longer live. Complying with safety standards (for example the French standard NF C 15-100) is essential.
- Remove the old fluorescent tube. Take out the used "neon" tube by turning it a quarter turn until its pins line up with the slots in the lampholders, then gently pull it out. Take it to a recycling centre (fluorescent tubes contain mercury).
- Remove the starter (if there is one). If there is a starter (a small removable cylinder), unscrew it and take it out. It is not needed with an LED tube and must be removed from the circuit.
Note: as LED tubes do not need a starter to light up, simply leave the starter socket empty. - Bypass the ballast and modify the wiring. The aim is to bypass the ballast so that the LED tube is powered directly by the mains live and neutral. Proceed as follows:
- Disconnect the ballast: locate the ballast (a rectangular box) and disconnect the input and output wires connected to it. You can also remove it if it is easy to reach.
- Reconnect the wires directly: connect the supply wires directly to the LED tube's lampholders, bypassing the ballast.
- Double-ended LED tube: connect the live to both pins at one end and the neutral to both pins at the other end.
- Single-ended LED tube: connect the live and neutral to the two pins of the same lampholder (usually marked) and leave the other end unconnected. Use suitable connectors / terminal blocks.
- Insulate the connections: once connected, carefully insulate all connections (terminal blocks, insulating tape, heat-shrink sleeving) to prevent any contact or short circuit.
- Option: you can physically remove the ballast or leave it in place, disconnected. What matters is that it is out of the circuit and that no wires are left exposed.


- Insert the LED tube into the fitting. Place the new LED tube in the holders (lampholders) as you would a fluorescent tube. Line up the pins with the slots, then turn until it locks. For a single-ended tube, check that the tube's supply end matches the live connections of the fitting (refer to the marking on the tube, if any).
- Restore the power and test. Switch the power back on at the consumer unit, then switch on the light. The LED tube should light up instantly. If not, switch off the power again and check your wiring: a missed connection, a poorly insulated wire or a single-ended model fitted the wrong way round. Correct if necessary and try again.
Summary table of installation steps by type of fitting:
| Step | New LED batten (no ballast) | Old fluorescent fitting (with ballast) |
|---|---|---|
| 1. Switch off the power | Yes | Yes |
| 2. Mount or open the fitting | Fix to the wall or ceiling | Open the fitting to access the wiring |
| 3. Check the wiring | Pre-wired for LED tubes | Needs modifying: bypass the ballast |
| 4. Remove the ballast | Not applicable | Disconnect or remove the ballast |
| 5. Remove the starter | No starter fitted | Remove if present |
| 6. Reconnect the wires | Ready to use | Direct connection to the lampholders depending on the tube |
| 7. Insert the LED tube | Standard insertion | Standard insertion, fit the right way round if needed |
| 8. Restore the power and test | Lights up instantly | Check the wiring is correct |
Additional advice & safety
Before modifying or installing your LED tubes, check compatibility and follow the manufacturers' recommendations.
- Check that the tube and holder are compatible: make sure the LED tube format matches your installation. LED tubes come in the same standard lengths as fluorescent tubes (e.g. 60cm LED tubes, 120cm LED tubes, 150cm LED tubes) and with the same caps (G13 for T8, G5 for T5). Choose a replacement tube of the same length and diameter as the old one.
- Keep the manufacturers' instructions: for compliant wiring, refer to the diagrams and instructions from your LED tube manufacturer (fitting direction, wiring, etc.). The manufacturer's instructions take precedence over general rules.
Safety first
If you are not comfortable working with electricity, call in a professional electrician. Always work with the power off and check that there is no current before starting. Wear protective equipment if necessary and work methodically to enjoy efficient, worry-free LED lighting in place of your old fluorescent tubes.