



Essential steps for installing an LED ceiling light
To install your ceiling light in the best possible way, all you need is the right equipment and the necessary precautions. Here are the steps to follow to install your LED lighting on the ceiling.
Electrical and mechanical steps for fixing your light to the ceiling
The first step is to remove your old light. To do this, you need to switch off the power or existing supply so that you can disconnect your old halogen, incandescent or even LED bulb. Switch off the circuit breaker on your consumer unit.
After removing your old light fitting, your electrical wiring should be visible (with the neutral, live and earth wires).
Tools needed to install your ceiling lighting
Generally speaking, to install LED ceiling lighting, you will need:
- a tape measure;
- a utility knife;
- a pencil;
- a drill and drill bits;
- combination pliers;
- wire strippers;
- a Phillips screwdriver and a flat-head screwdriver;
- a cable puller or some wire.
Installing a mounting bracket for your ceiling light
If you want to install an LED ceiling light or a surface-mounted spotlight, you need to mark the spot where you want to fix your LED light.
Place the bracket over a cross marking, then mark the various holes to be drilled to fix the bracket. For surface-mounted spotlights, using a drill bit matched to the wall plug diameter ensures the holes are the right size. You can then drill the hole for the power cable. Insert the wall plugs, position the bracket, insert the screws and screw the bracket in place.
For pendant lights, the suspension anchor needs to be installed first. Drill at the marked spot with a bit of the same diameter as the anchor, then screw in the suspension anchor.
If the light fitting is fixed using a DCL box, mark the drilling point corresponding to the position of the threaded rod. To do this, place the box in its housing, remove the box and then drill. Fix the rod and refit the box, remembering to pierce the knockout for the wires. Use a hole saw if you need to cut the housing for the connection box in a solid ceiling. Tighten the screws firmly.
Which light fitting should you install for LED ceiling lighting?
The choice of ceiling light depends on your decorating tastes, the atmosphere you want and your budget.
At the ceiling, you need to identify the wires, pull them out and connect them to those of your ceiling light:
- The neutral wire to terminal N (the blue wire);
- The earth wire in the middle (the green/yellow wire);
- The live wire to terminal L (the red, brown or black wire).
If your ceiling has no DCL box, you will need to drill one or more holes next to the electrical supply to fix the light fitting's bracket. Installation becomes more complicated if there is no electrical wiring in your ceiling. In that case, it is safer to hire an electrician. We explain how to install the different types of ceiling lighting.
Connecting an LED strip on the ceiling

An LED strip is easy to install on the ceiling, especially in a teenager's bedroom. You can choose between low-voltage LED strips, such as 12V or 24V LED strips, and 220V LED strips. If you opt for 12V or 24V LED strips, you do not need to fix your strip in place, as it already has an adhesive backing behind the LED chips. Simply stick the strip around the room you want. Please note that 12V and 24V strips need a power transformer.
For 220V LED strips, mounting clips must be used for an effective installation. You only need a connector or a rectifier to connect directly to the strip. Silumen also sells protective covers to protect your LED strip ceiling installation, which can be fitted over the end of the strip if you want to cut it.
Good to know
Please note that Silumen LED strips can only be cut at the cutting marks shown on the strip, whose spacing varies according to the model (12V, 24V or 220V). These marks, often a scissors symbol, guide you when cutting and prevent you from damaging any of the strip's LED chips. If you cut your strip anywhere else, the entire strip may stop working.
Fitting your LED ceiling light with ease

The work needed to fix an LED ceiling light depends on the condition of your electrical installation. If you do not have a DCL box (light fitting connection device), your electrical installation is old. First, thread the ceiling light cable onto the plastic terminal strip. Then hang it from the anchor hook and connect the conductors using a quick connector or a terminal block. You can then push the canopy back up to hide the fixing system.
If, however, you have a DCL box, it normally includes a lampholder as well as a suspension hook. First, place the DCL box in its housing so that you can mark the position of the threaded rod. Then remove the box and drill a hole of the same diameter as the rod. Once the threaded rod is fixed to the ceiling, refit the DCL box and pierce the knockout to feed the electrical cables through. If the LED ceiling light is being fitted in a solid ceiling, use a hole saw to cut the housing for the connection box. Finally, make the connections.
Installing an LED spotlight in an existing ceiling
If you want to install LED spotlights, you first need to know how many spotlights you want to install in the ceiling. This depends on the ceiling height, the area you want to light and the wattage of the spotlights. For a living area, allow on average around 300 lumens per m², or around 300 lux.
For a recessed spotlight, you need to take into account the space taken up by the transformer behind the spotlight to avoid any risk of overheating or electrical fire. It is strongly recommended to keep a safety gap between the recessed spotlight and the insulation (especially glass wool). You must keep at least 10 centimetres between the existing ceiling and the spotlight. All ceiling lights must be connected to earth (green/yellow wire), except Class II fittings. After that, you can finally connect the spotlight transformers.
For a proper, risk-free installation, you should:
- make sure the glass wool is suited to the heat given off by the chosen recessed spotlight;
- leave space between the glass wool and the ceiling spotlight;
- keep the insulation away from the heat produced by the spotlight by fitting a spotlight heat sink;
- place the transformer at a good distance from the insulation and the spotlight, in a ventilated spot, and cover it with a non-flammable support;
- add a protective cover to the spotlight to prevent contact with the glass wool.
Installing LED panels in a suspended ceiling or surface-mounted
The choice of LED panel model to install on the ceiling depends on the layout of the room to be fitted out and its decorating style. These are the main criteria that determine which LED panel models you need. Do not hesitate to ask a professional to help you make a choice perfectly suited to your home and your wishes.
If your offices need very functional, very bright lighting, it may be wise to install LED ceiling panels. A wide choice of models is available, with recessed or surface-mounted fixings. Silumen offers several sizes, up to 120 cm long, as well as multipacks of LED ceiling panels to place in several areas of the ceiling.
LED panels are supplied with a transformer. Connect the transformer to your power supply and then slide the LED panel into your suspended ceiling. Silumen also offers mounting kits for LED panels, whether surface-mounted or suspended. For surface-mounted fixings, install three sides of the frame, then insert your LED panel into it.
Fitting your LED pendant light to the ceiling
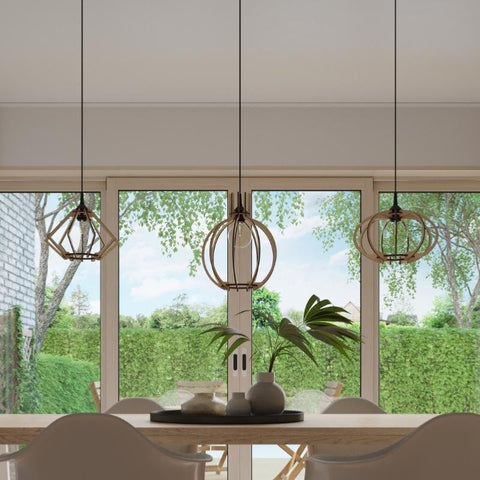
If you want to install pendant lights on the ceiling, first check your ceiling height so that the pendant lights do not get in the way of people moving around.
As with other light fittings, you must switch off the power first. The simplest way is to switch off the circuit breaker, then flick the light switches to make sure the power is off. Check whether there is a hook or a terminal strip in the ceiling where you want to hang your designer pendant light, and that it is compatible with the pendant you want to install. If not, you will have to drill into the ceiling and install a hook. Once this fixing is in place, connect the wires coming out of the ceiling to those of your pendant. After stripping them by 1.5 cm and twisting them together, place them under a connector cap or in the terminal block. If your ceiling does not have a visible electrical supply, let a professional help you.
Installing a track light on the ceiling
Installing track lighting on the ceiling is not very complicated. However, you need to follow these instructions to complete the project safely. Whether single-phase or three-phase, a ceiling-mounted track light brings functional and stylish lighting to your interior.
Never forget to switch off the power before starting any electrical work. Once you have done so, mark the planned position of your track lighting in pencil and drill the holes for fixing the spotlight track with an electric drill. Then insert the wall plugs and position the mounting brackets that hold the LED spotlight track in place. Tighten the fixings firmly so that they can support the weight of your light fitting. After this, you can move on to laying the electrical cables. As with any other light fitting, you need to connect three electrical conductors to the connection terminal block: live, neutral and earth. Finally, install the professional track spotlights using the adapter, which also serves as their mount. As soon as the LED track spotlights are installed, you can switch the power back on and test your installation.
If you want to use several tracks at the same time, get suitable track connectors (straight, angled and X-shaped) to link them together.
Fitting an LED batten on the ceiling
LED battens are perfect for lighting your interior, whether at home, in the office or in a shop. There are many types in various sizes (between 30 and 150 cm) and with different functions (with emergency light, with sensor, etc.). To enjoy the efficient, low-energy lighting of our LED tube battens, you first need to install them.
To install your light batten on the ceiling safely, switch off the power and get the right tools. You can then move on to the installation itself. First, you need to determine exactly where it will be fixed, then mark this in pencil. Next, drill the fixing points, insert the wall plugs and screw on the mounting clips. Install the power cable and wire up the LED tube batten, following the colour code of the power cable. Finally, install your LED light batten by clipping it onto its mounts, insert the right LED tube if necessary, close the fitting with its cover, and you are done! All that remains is to switch the power back on and test your lighting.